Successful Seed Starting to Get Your Garden Growing
Published on
January 29th, 2022
In addition to saving you money, growing your own herbs, vegetables and ornamental plants from seed is extremely rewarding.
Getting Started
Whether this is your first time starting seeds indoors or your fifteenth, having the right products and creating the perfect growing conditions for indoor seed starting will help you produce a bounty of delicious vegetables to enjoy!
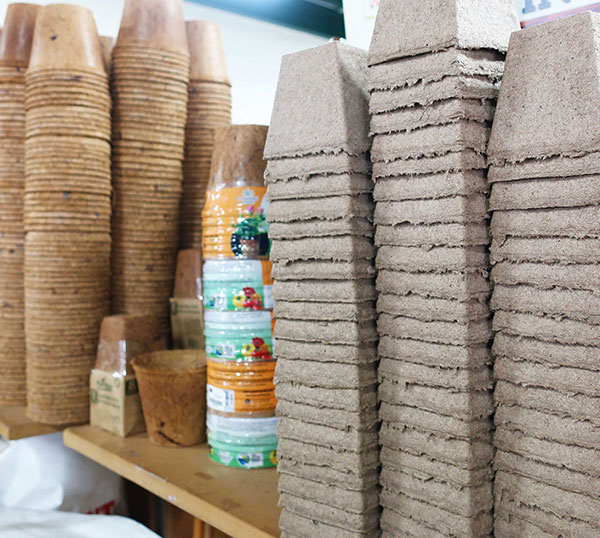 Grow Pots
Grow pots come in a variety of materials. Whether you choose to use peat pots, coconut coir, plastic trays made for starting seeds or containers you already own, choose containers with drainage holes to avoid damaging your seedlings with standing water.
If you’re worried about transplanting, peat pots are a great choice as they can be planted directly in the garden. When reusing containers, be sure to disinfect by soaking in a solution of 1 part bleach to 10 parts water.
Soil
Seeds usually do best with a professional soilless mix. Use Seed Starting Mix for to maximize results. By avoiding soil at this stage, you minimize the risk of pests and soil-borne diseases damaging your young plants.
Seeds
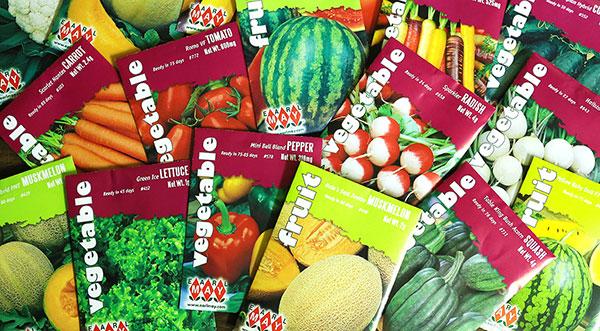 Before starting seeds indoors, you must first decide what you want to plant outside, where it will be planted and when it will be planted. Not all seeds are good to start indoors. Root crops and cold-hardy seeds need to be planted directly outdoors as soon as warm weather allows. The following are great for seed starting:
- Tomatoes
- Peppers
- Cauliflower
- Chilis
- Squash
- Broccoli
- Melon
- Most varieties of flowers
When selecting seeds, most vegetables will have several varieties to choose from. Choose the variety that is right for you based on space and light requirements. Once you’ve made your decision you can check the transplant dates to help determine the date you should start the seeds.
Water
Sow your seeds in a moistened mix and check them daily. Avoid watering new seedlings from the top. This can cause disease and fungus or damage the roots.
Use plastic cover to trap humidity and warmth for the growing seeds. As seedlings grow and get taller, gradually reduce the amount of time they are covered.
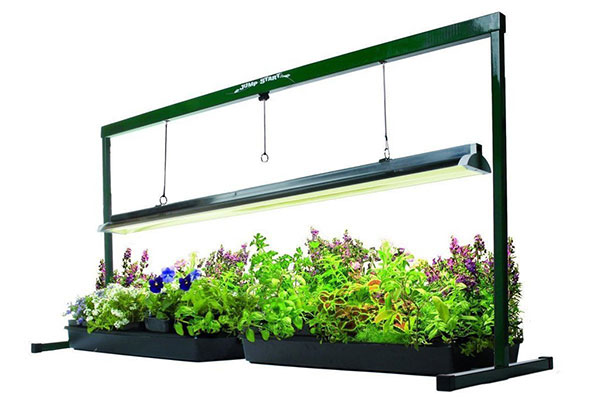 Light
LightSeeds love the light! 12-16 hours a day is best. Supplement with grow lights for best results. See ourpost on using a grow light for seed starting to learn more.
Temperature
Correct temperature is one of the environmental conditions critical for seed germination. Most seeds require temperatures of 70 to 75˚F degrees to germinate. To keep the medium at 70˚F or above, adding gentle bottom heat is recommended. This heat may be obtained from a warm spot such as the top of a refrigerator or by using a heating cable or tray. If you have the space, consider germination under lights as it is the most productive method.
Time to Plant
Don’t start too soon! To determine the best time for seed starting indoors, look up the last spring frost date from your area and count back 4-6 weeks.
Sow Your Seeds
Some gardeners prefer a single-step method of sowing seeds where two to three seeds are planted in individual containers. After the seeds germinate, pinch off the smallest seedling, leaving the most vigorous to continue growing.
If you are using a seed tray, the seedlings will be easier to transplant if the seeds are sown thinly. Covering the seeds with perlite will aid in keeping them moist. After the first set of true leaves develop, transplant the seedlings into a tray with more growing room or into individual containers. Containers or trays should be filled with a soilless mix to within ¼” of the top.
Covering the container with glass or plastic minimizes the need for watering – check the medium often to make sure it isn’t drying out.
Transplant Your Seedlings
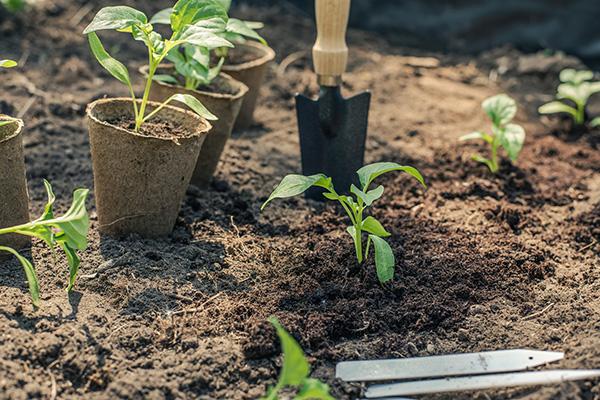 Once the seeds have germinated, remove any plastic or glass from the seed flats. When outdoor conditions are right and your seedlings are more mature, gradually move them into full sun. This process is called “hardening” and prevents sudden changes in light and wind conditions that may injure tender seedlings.